How To Use It
There are only 2 static functions that you need to use to start the trail and stop the trail.
Start Trail
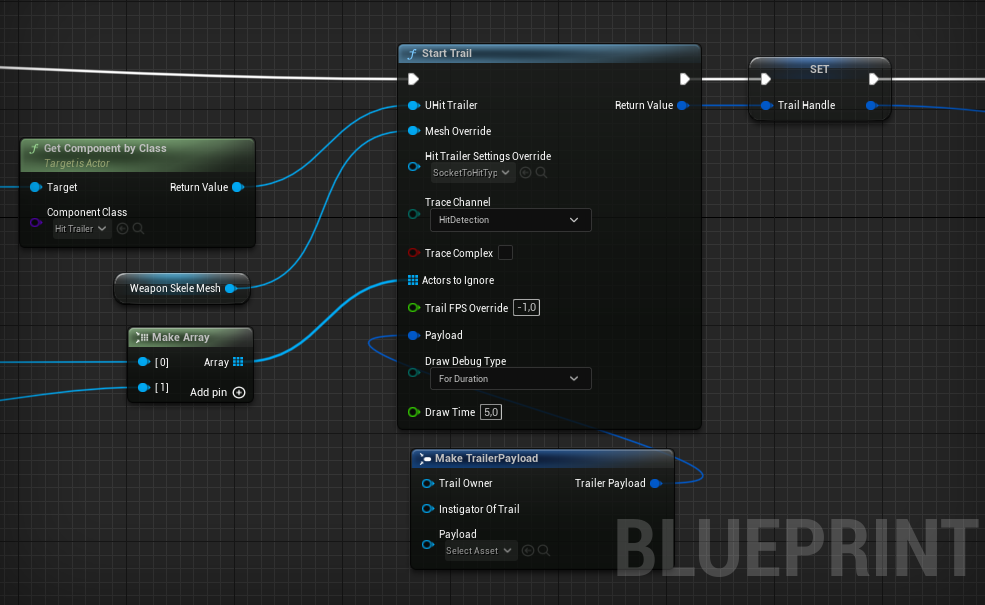
Start Trail Inputs
- UHit Trailer: The Hit Trailer Component.
- Mesh Override: The Skeletal Mesh to trail. If not given function will try to find a skeletal mesh component of the
UHitTrailer's owner actor. - Hit Trailer Settings Overide: The Data asset to be used to find the sockets from the skeletal mesh and get the related values for the trail.
- Trace Channel: The channel to trace from. You should use an overlapping trace for the trace's targets.
- Trace Complex: Wheather the trace should be a normal or complex (just like in default tracing).
- Trail FPS Override: The time of interval between traces will be determined by this value. If given below zero, given Hit Trailer's
Trail Interval FPSvalue will be used. - Payload: This has no impact of the tracing but can be accessed from the trail's hit result.
- Draw Debug Type: Wheather to draw debug trails or not. If so, how?
- Draw Time: If
DrawDebugTypeis set toFor Durationtrail lines will persist for the given duration.
Start Trail Output
- Return Value: The handle to keep track of the trail. You can break it to get the
Trail Objand bind event onOnHitEvent. And also you need this handle toStop the Trail.
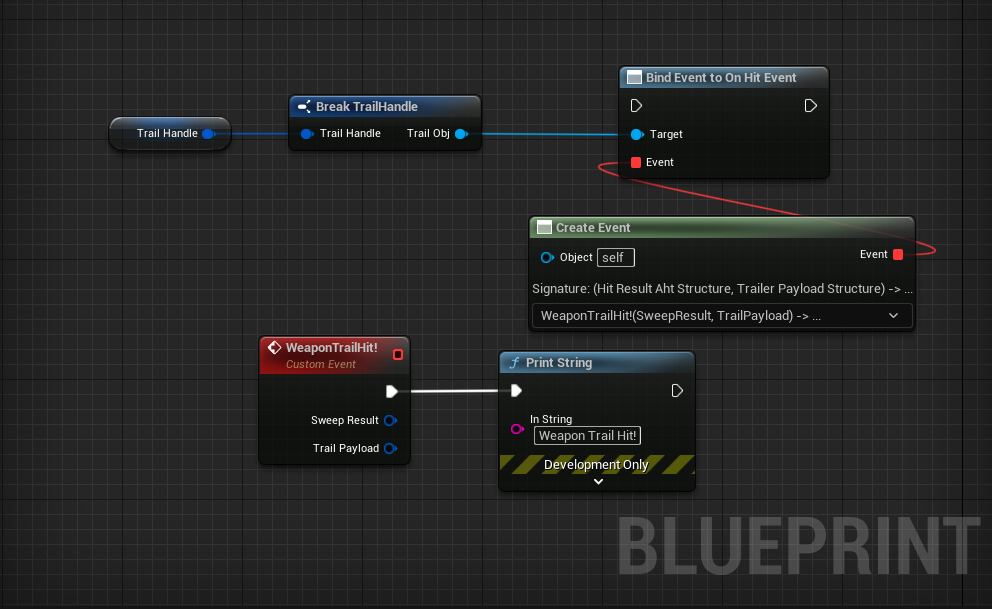
note
To bind events inside functions use Create Event node. Otherwise events cannot be used inside blueprint functions.
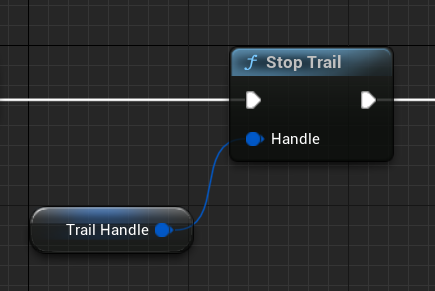
Stop Trail
This is simple enough. Just keep in mind that you cam stop the trails even if it is already stopped. So you don't need to check it.