Quick Start
There a few quick steps that we need to do in order to use NIA. This section will summurize that and give you a quick overview.
Inventory Manager Component
This is the component that we need to attach to our actors (Generally Characters, Chests, Item Actors etc.) who want to use an inventory and edit it.
This component creates a inventory item at begin play, therefor a Item Payload and therefor a Inventory System. Inventory System is the system that handles the all inventory system logic (holding the inventory, getting slots etc.). You can quickly access Inventory System through GetInventorySystem method in the compononent.
Other than creating the inventory system object at initialization, this component's main responsibility is to Manage the sub objects's outer and Replication.
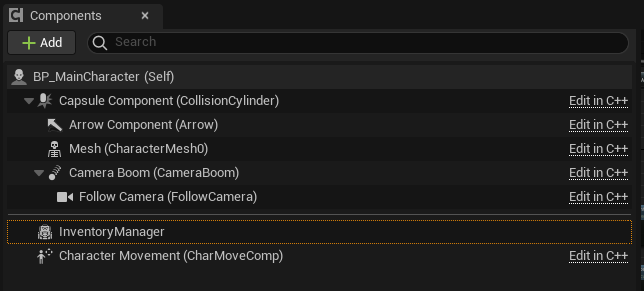
1) Add Inventory Manager Component to Your Character
In Blueprints it will look like this:
2) Select a Default Payload Template for the Component
This asset will initialize the character's inventory with given sections.

For replication, you should make sure that in the Class Defaults, Replicates and Replicate Using Registered Sub Object List options are check true in the Actor that Inventory Manager Component is attached to.
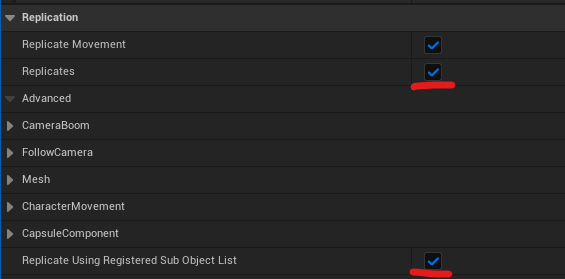
This will allow the inventory objects to use RPC's and replicate variables through Inventory Manager Component.
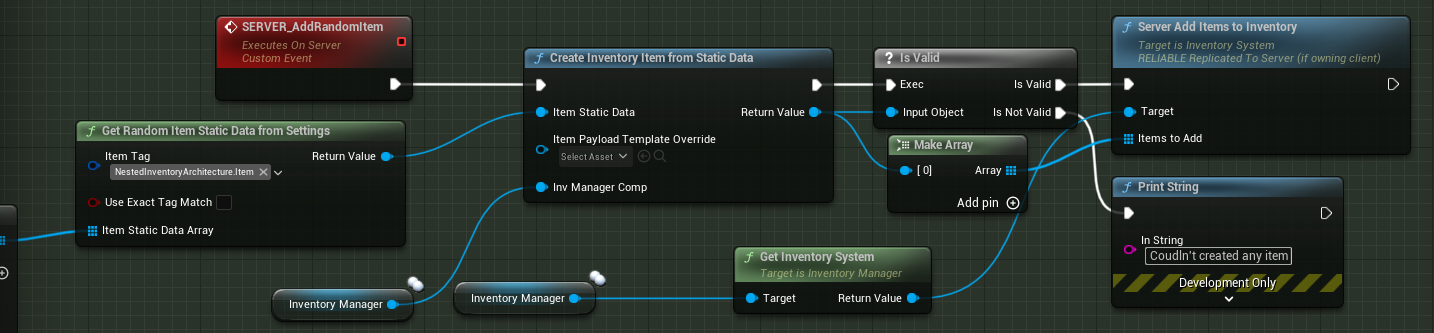
Replication logic is not different for creating new objects. You have to use a server side function to create new inventory items in your runtime logics.
Create Your Inventory Template and Items
To create your own Inventory Template Instance, Right click on the Content Browser, Go to Miscellaneous than Data Asset. Search for Inventory Template and select.
1) Gameplay Tags as Sections
Inventories are consists of sections which are determined by Gameplay Tags.
This tags are used in both the items and the sections. You should populate your project Gameplay Tags in order to differentiate your items. Such as:
ItemType.Outfit.Helmet, ItemType.Container.Backpack, ItemType.WeaponAttachments.Scope etc.
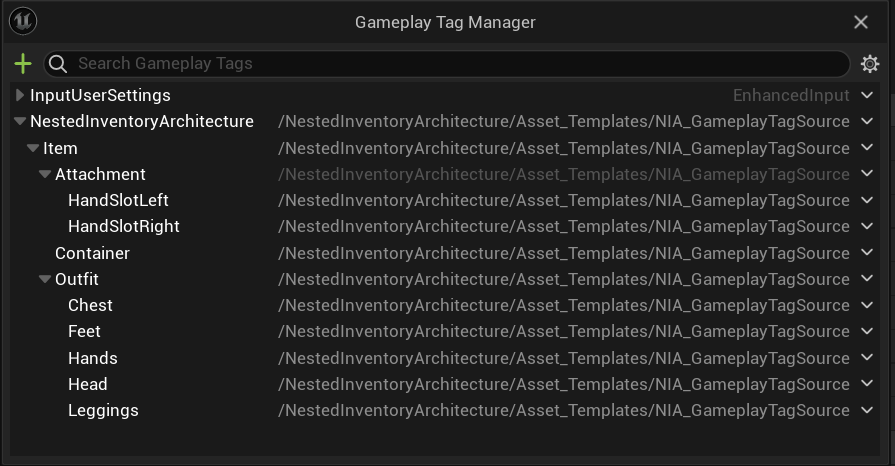
To copy this gameplay tags architecture, add NIA_GameplayTagSource to the Gameplay Tag Table List.
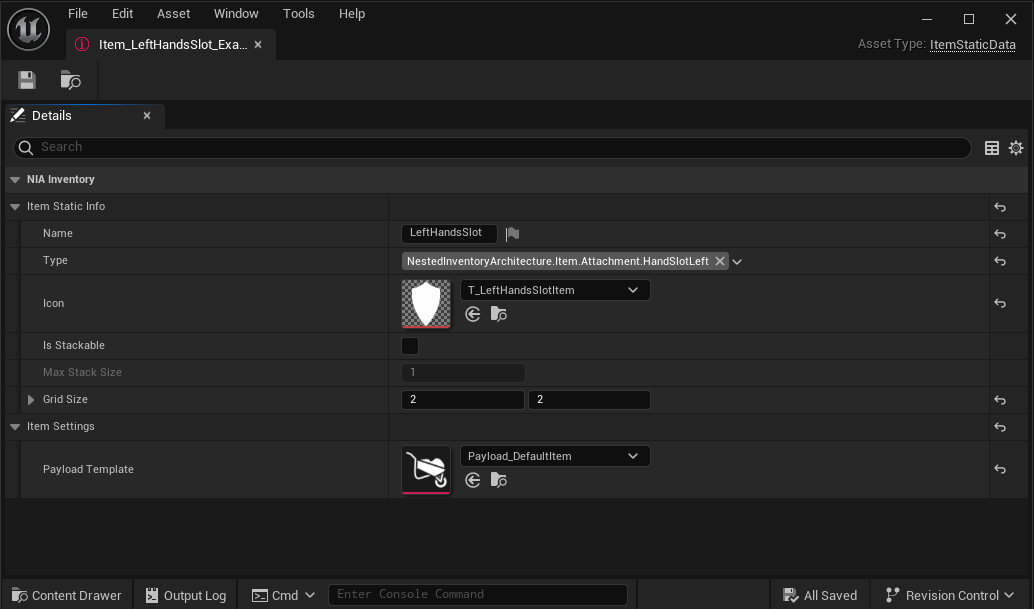
2) Create Your items
Create another Data Asset Instance based of Item Static Data. You can always create a BP' of this Data Asset and create your own variables. This is just a basic item. It doesn't even have a mesh.
3) Organize Your Template
Populate your inventory template for your character as you wish. Or even add default items that will spawn when the component initializes at Items array.
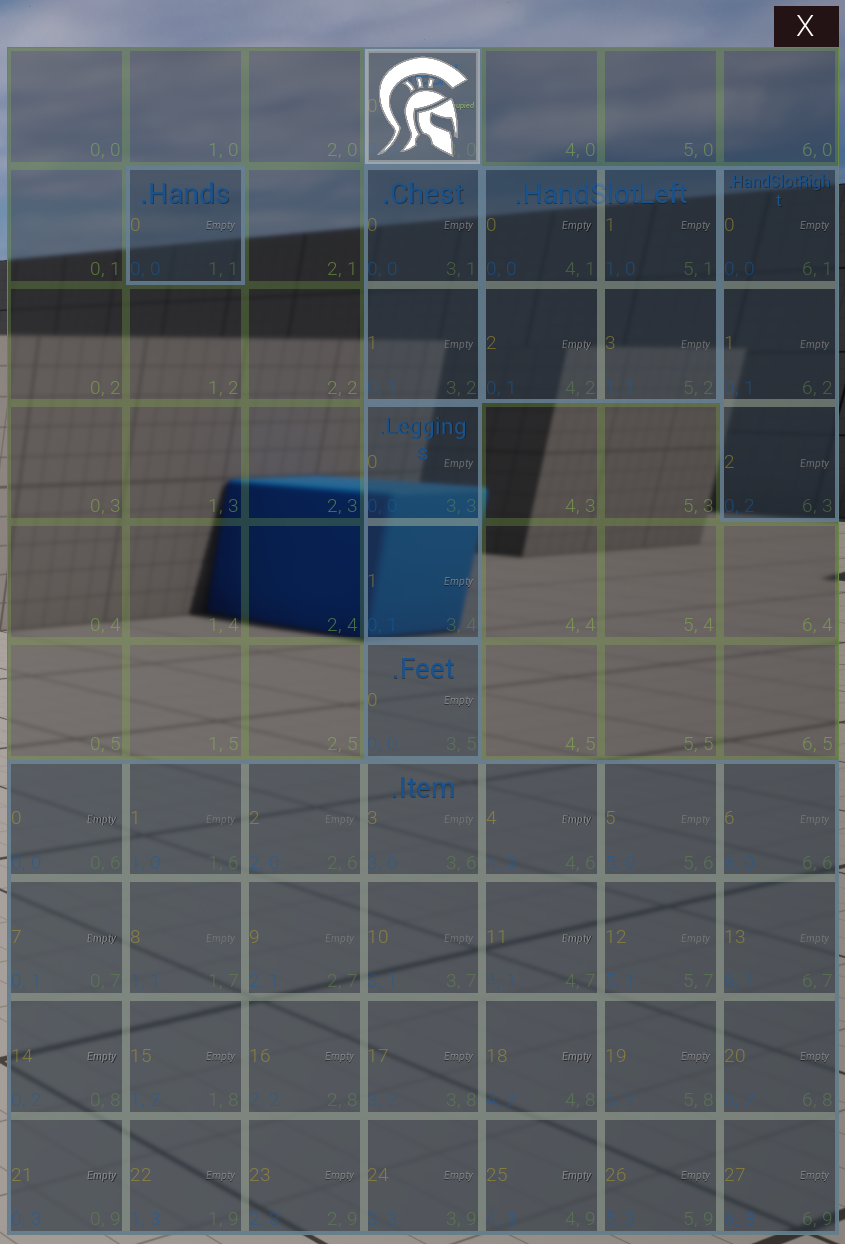
An Example:

Example's In World view:
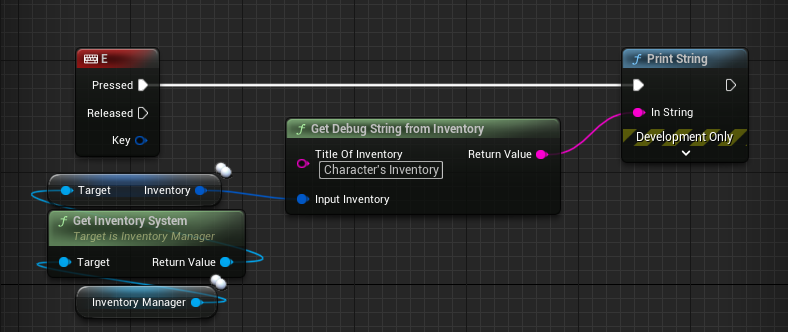
After this you are ready to Use NIA! To determine if your inventory is working, you can call the GetDebugStringFromInventory and provide your inventory, than print it.
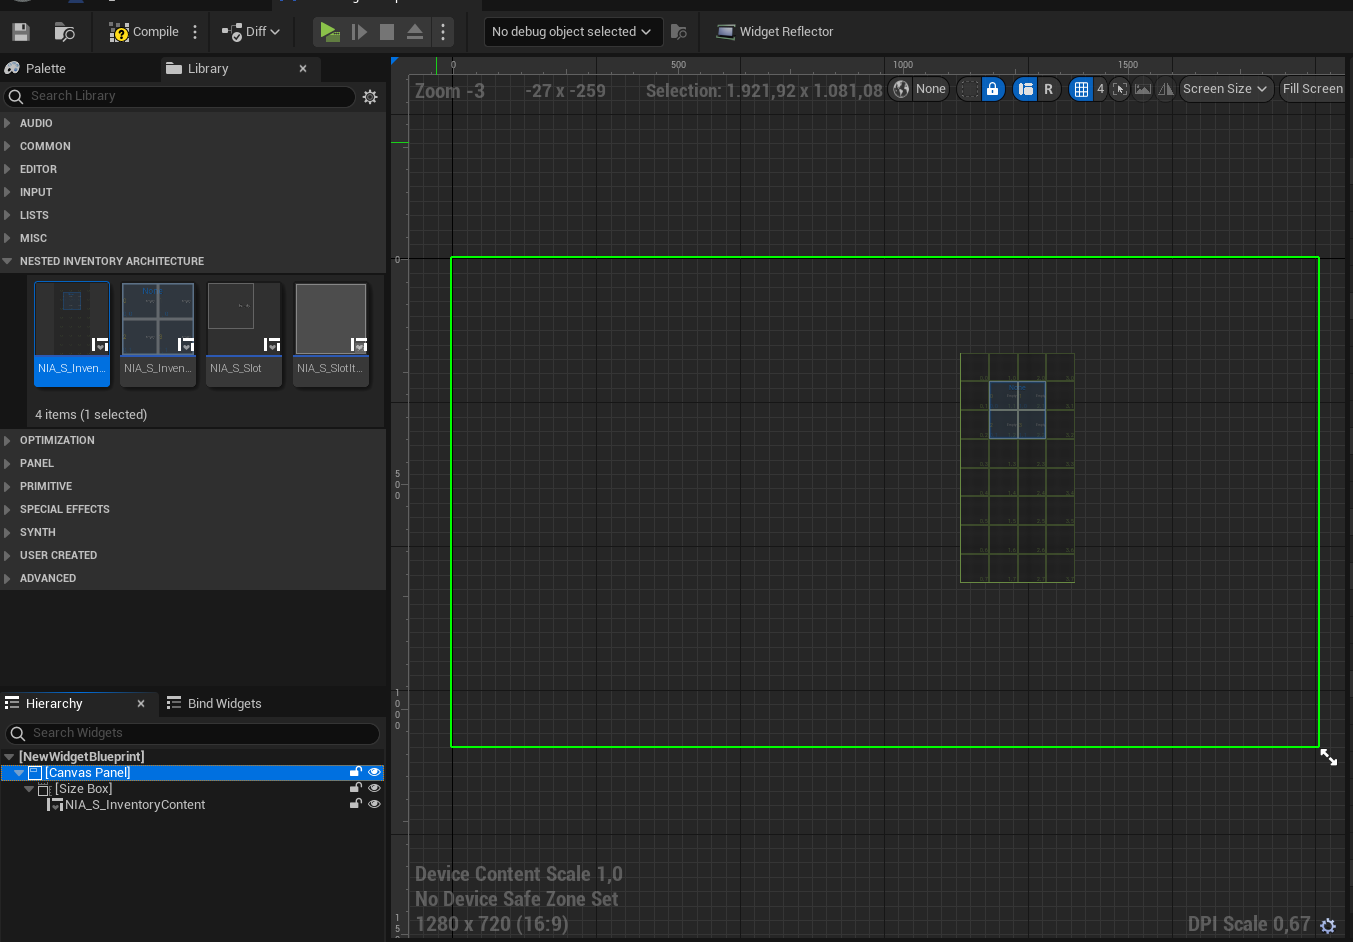
Create Your Inventory Widget
You are free to use any UI you want with this architecture. If you want to use the NIA's template, create a new User Widget, add a Container to hold the Inventory Content Widget. And create Inventory Content Widget and add to this container in your Graph by providing the Inventory System that the widget is based to (Generally your character's Inventory Manager's inventory system).
After this you can add your own logic to handle inventory widget UI.